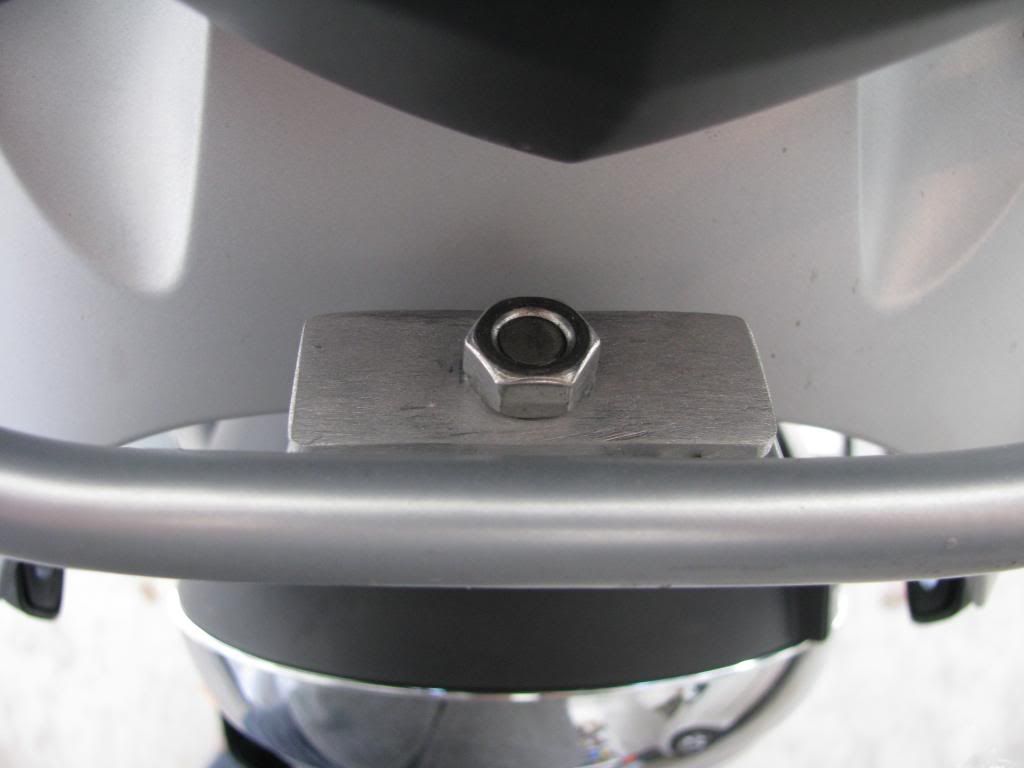
Looking down at the modified front bracket from above:
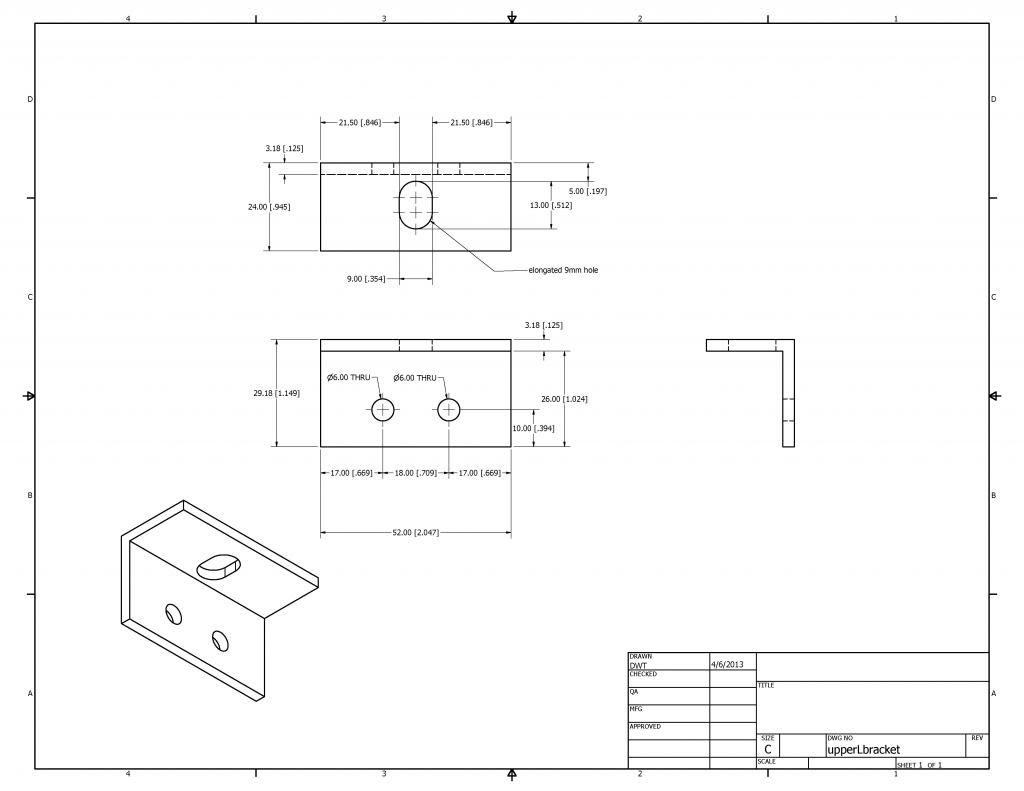
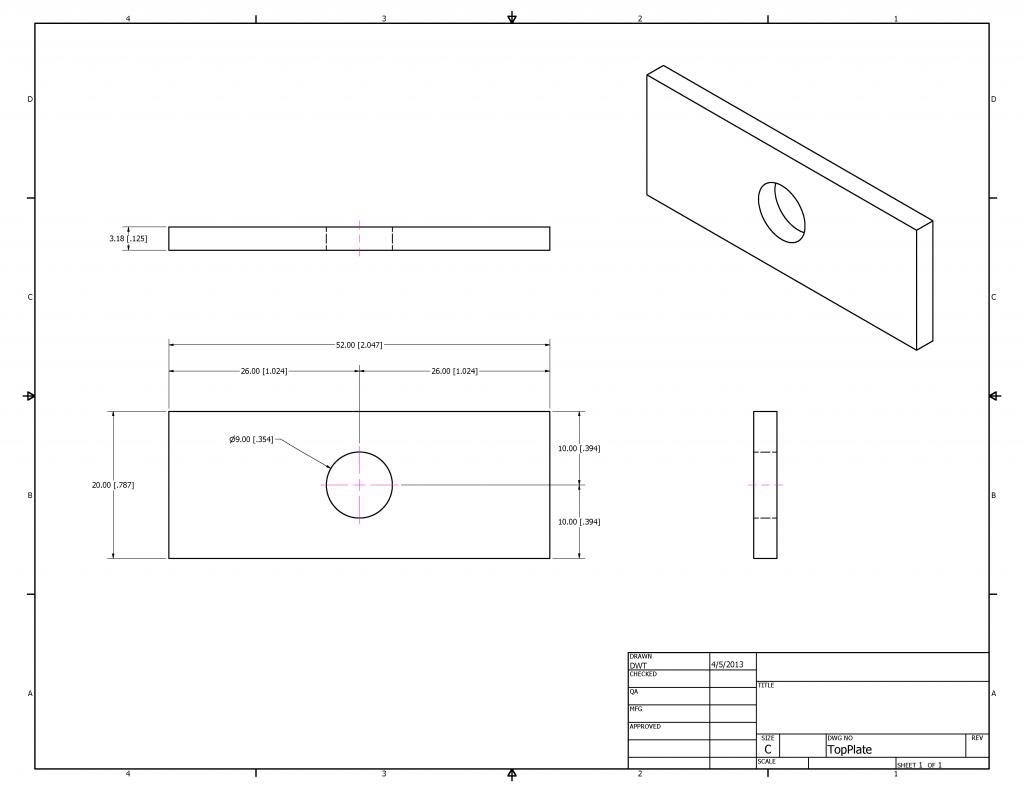
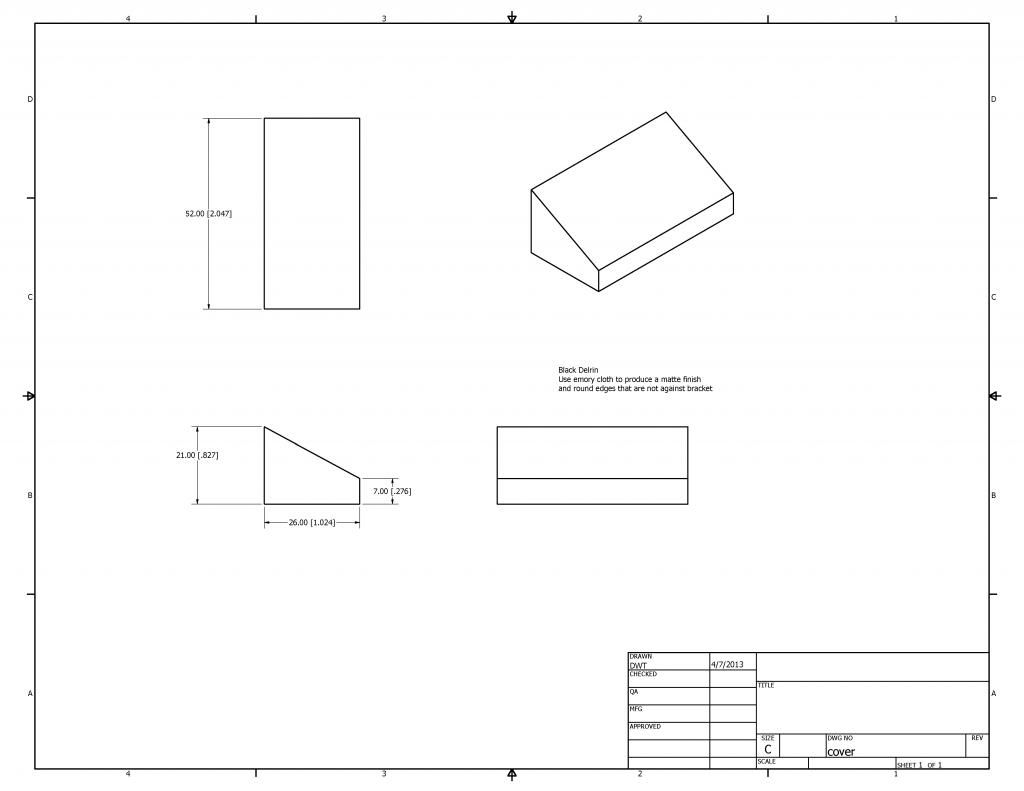
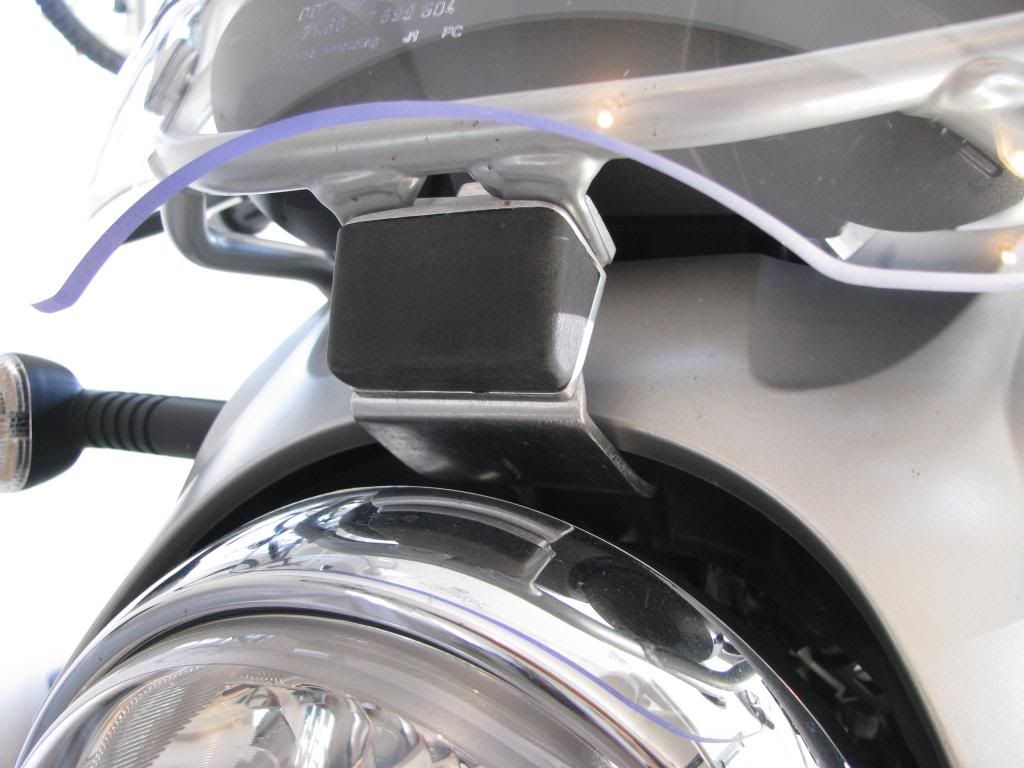
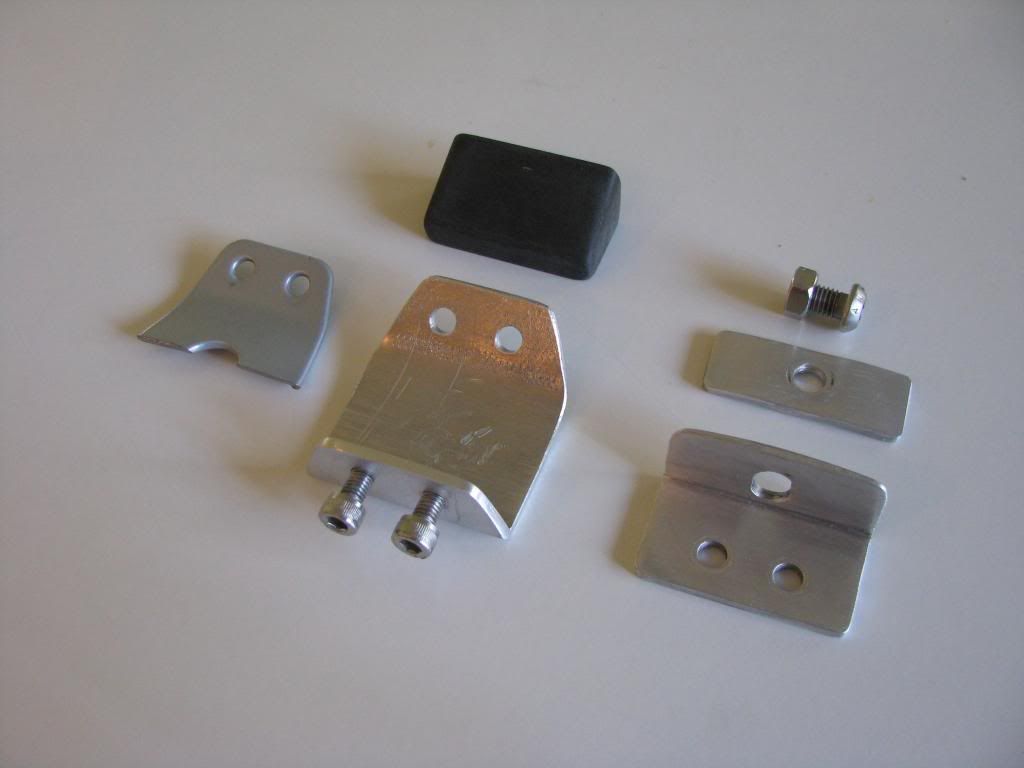
The custom bracket consists of several parts as shown below. First, I cut off the end of the mount on the front of the OEM bracket with a dremel cut-off wheel. This leaves two stubs about 3/4" long (see photo further down in post; paint exposed metal ends with aluminum-colored Rustoleum paint ). The piece I cut off is shown in the left of the drawing below. It is not used again. It is replaced by the aluminum piece to its' right in the drawing, which is longer and curved to extend beyond the end of the plastic cover above the headlight and then angle up. It contains two 5 mm tapped holes for two 5mmx12mm allen head screws that are used to attach the angled piece to its' right, which together with the flat plate above it, are used to sandwich the cut two stubs that remain on the OEM front mount using a 8mmx15mm button head bolt (shown above flat plate; mine is a torx head). The black block is black nylon (delrin; from McMaster Carr) and used as a decorative cover to hide the screw heads on the assembled cracket.
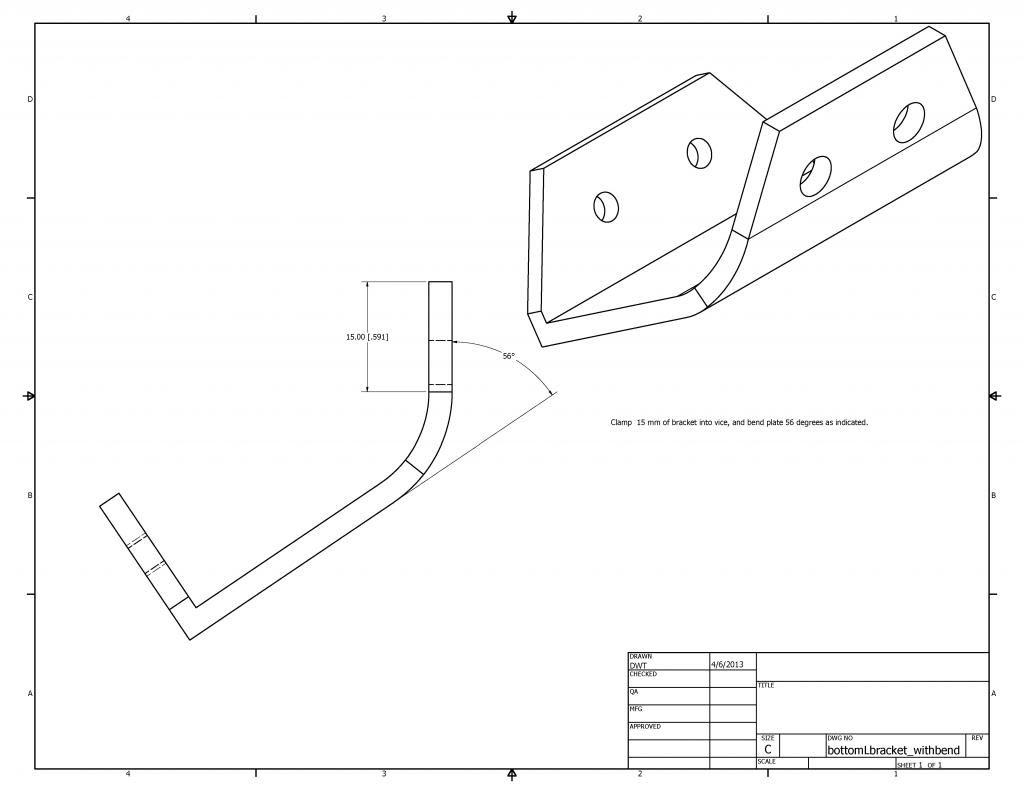
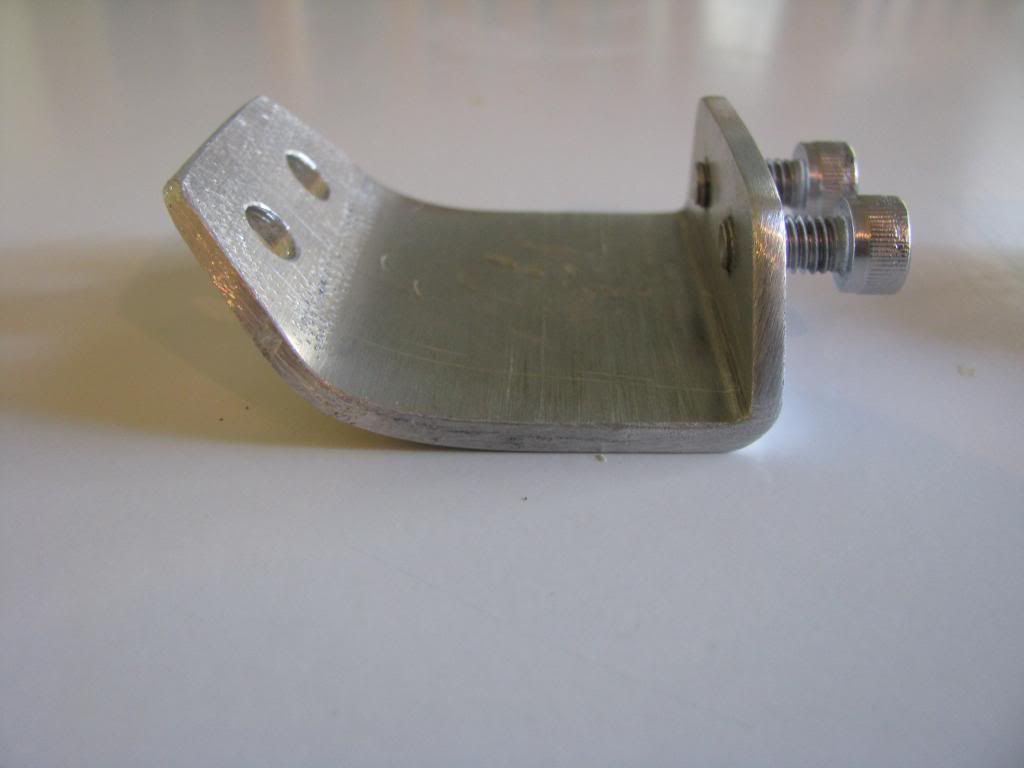
Here is the extension plate in cross section. It is made from a 1/8" thick aluminum angle stock (for the 90 degree bend) that is then bent in a vise to make the shallow bend of the curved section on the left.
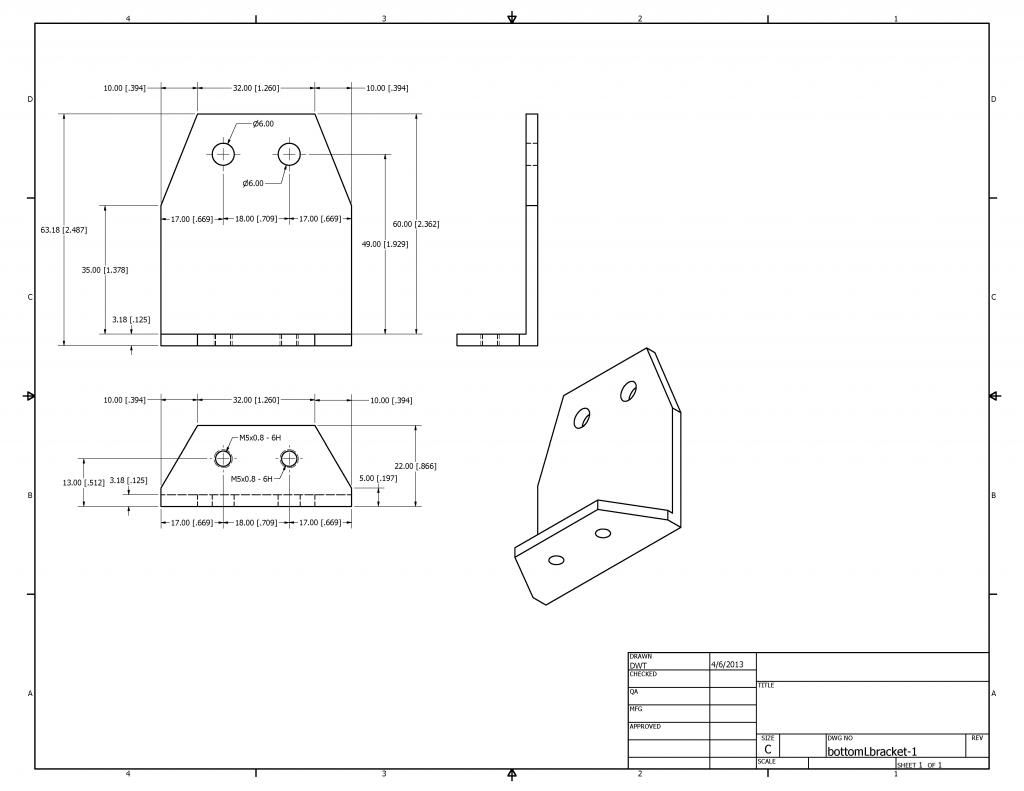
Here is the lower plate that sandwiches the stubs on the OEM bracket. It is also fabricated from 1/8" thick aluminum angle stock. I used a file to round the upper surface to match the underside of the stubs (which are slightly curved).

Here is a picture of the two stubs (about 3/4" in length) that remain when you cut off the rest of the front mount on the OEM bracket.
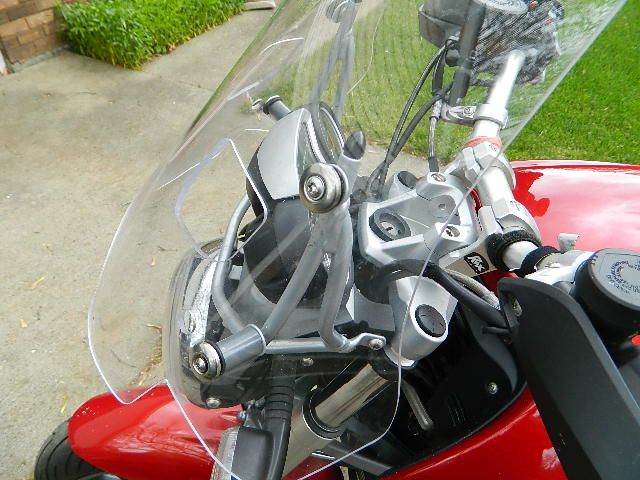
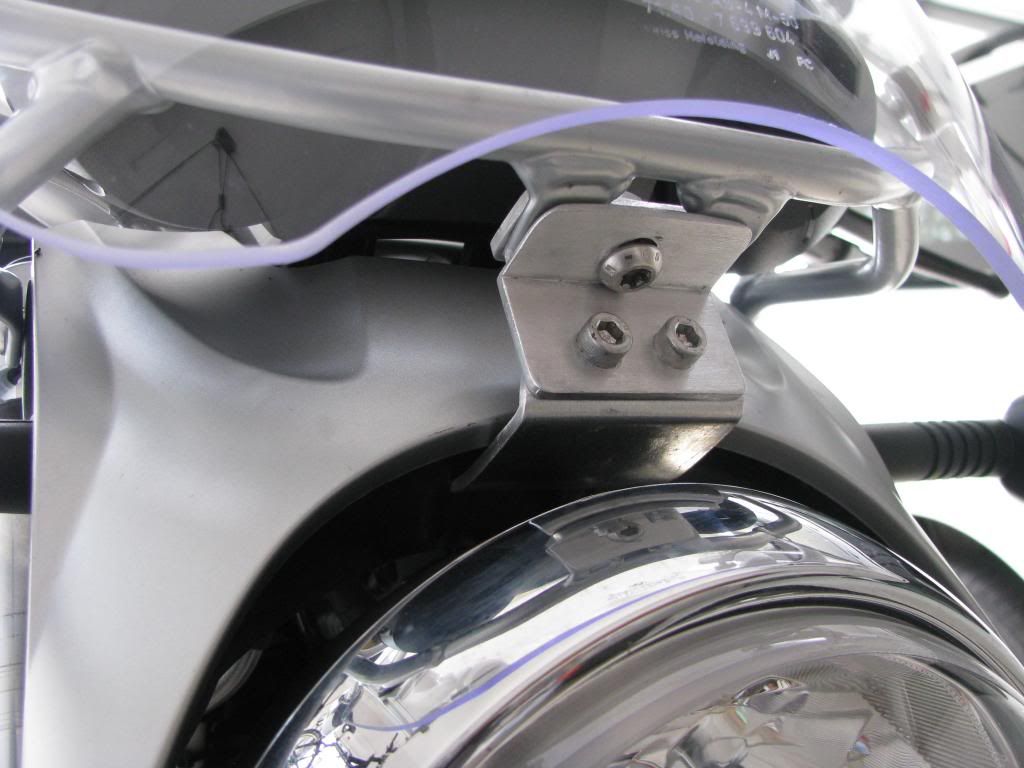
Here is a picture of the assembly on the bike, but without the delrin cover.
Here is a picture of the back of the delrin block. You can cut the basic shape easily with a bandsaw and round the corners on the front faces with emory cloth to give a nice matte black finish. I milled out cavities on the back to provide clearance for the screw heads on the plates this piece mounts onto. I used a milling machine, but these cavities could also be easily put in with a Dremel and bit. I attached the block to the plate with Permatex Super Weatherstrip adhesive. This stuff really holds it on tight; no danger of falling off.

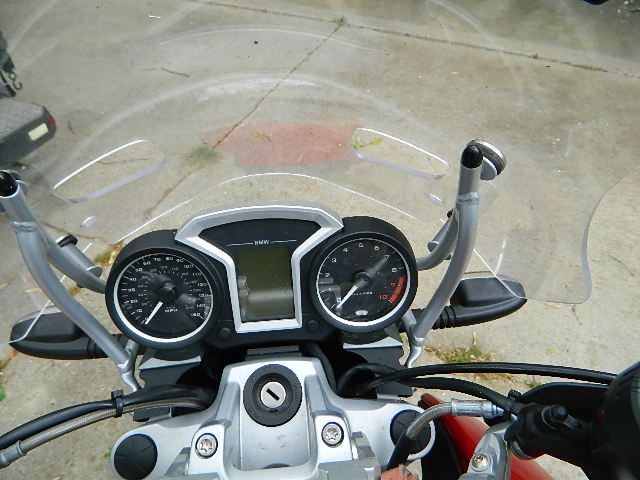
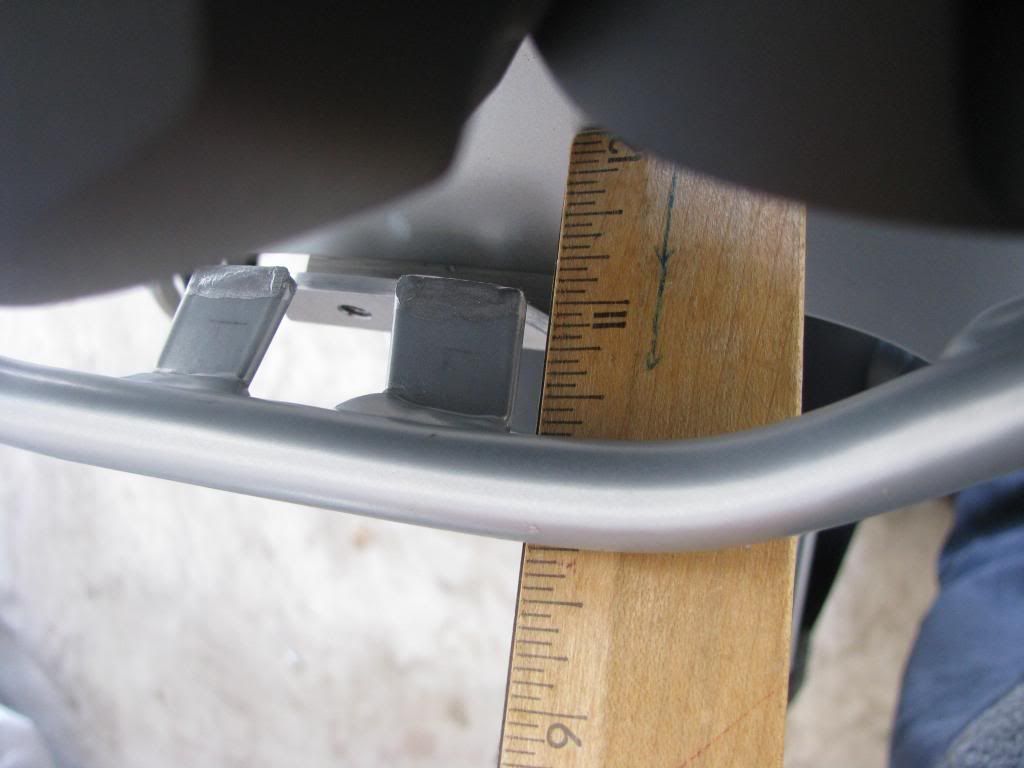
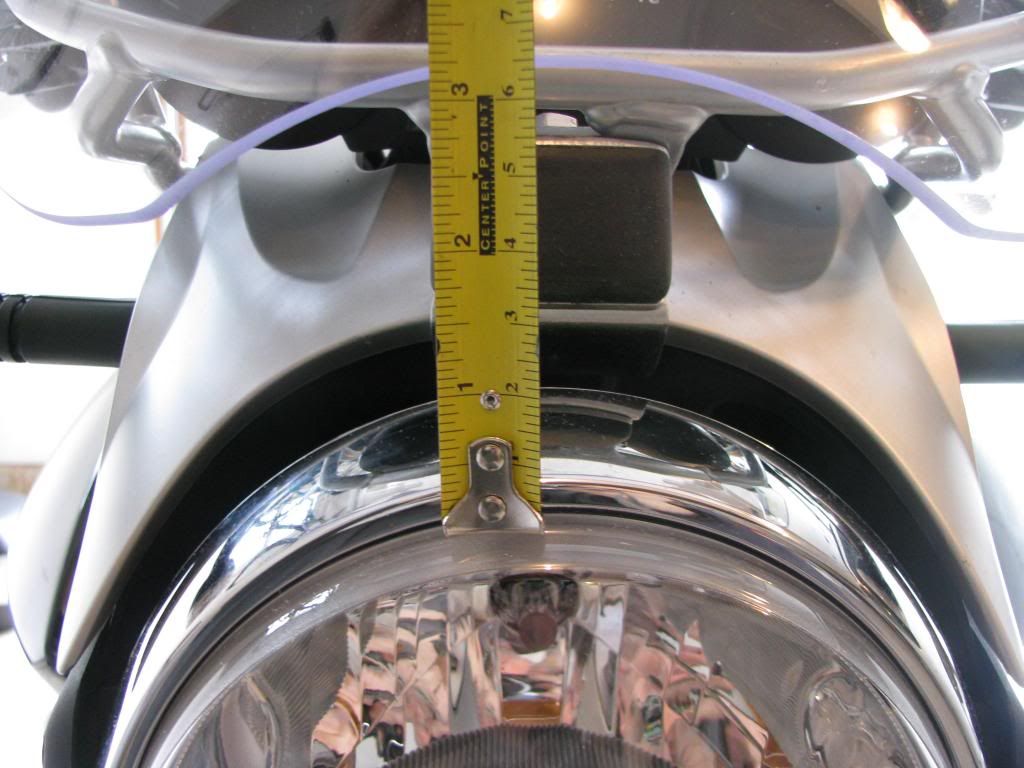
This shows the height of the front of the touring shield from the headlight. After cutting off the end of the front bracket I rode the bike with the windshield only attached by the rear two bolts. You can then rotate the windshield by hand back toward you until you find the right angle for minimum air turbulence. Then get off the bike and measure this distance from the inner chrome rim on the headlight to the bottom of the shield with a tape measure. Fabricate your bracket so that it reproduces this height. Mine is at about 3 1/4 inches. The nice thing about this design is that if you want to change the height, you change the smaller right angle bracket, not the whole lower bracket.
I am working on some mechanical drawings of the parts with dimensions and will post them as soon as they are finished. Of course you will have to modify the dimensions to your desired height of the shield, but they should get you started.